admin

APC Management Card Logoff

Occasionally with APC UPC management cards, it prevents web logon, with the following error:

Someone is currently logged into the APC Management Web Server

The easiest solution is to telnet to the management card, logon, and then logoff again.

(Solution found on APC support forums, repeated here for ease of finding)

Posted by admin in Information and Guides

2022: Best Windows Media Center Replacement?

Back in the XP days, Microsoft launched the excellent XP Media Center Edition (MCE), which was a slightly customised version of the bog standard XP Professional Edition, geared up to be a unified media solution to sit under your television.  Arguably launched before its time, as most TVs at the time had SCART and Component inputs, and most PCs had VGA only outputs.

Media Center  – then Windows Media Center (WMC) – became a core part of most Vista editions, and was further enhanced by a major update during Vista’s life.  By this time, large LCD TVs were commonplace, and allowed native PC connections via VGA, DVI and HDMI.

Sadly, after this major update, Microsoft lost the plot and tried to compete with Apple on their home turf, and they disbanded the Media Center team, but continued to include the software in most editions of Windows 7.

Windows 8 did not include Media Center, but did offer it as a low cost upgrade to Windows 8 Pro.  It was still, essentially, the same Media Center released during the life of Vista.

Windows 8.1 is the last version of Windows that still officially runs WMC, although there are enthusiasts who have managed to make it work on Windows 10 (though its far from a “set it and forget it” as MS updates frequently break it).

So, as of early 2022, what are the alternatives?

Well, that depends on your needs.

If you want a unified system that sits under you TV that can be controlled with low cost remote controls, and that can record/timeshift/play Live TV, you are only left with 1 option – Windows 8.1 and WMC.  WMC remains the king of such systems, is mostly “set it and forget it” (in many parts of the world, including the UK, you will need a 3rd party EPG solution, as Microsoft have abandoned providing a guide). It’s interface is clean, consistent, works great with common low cost MCE remotes, and is supremely reliable, even with power saving options enabled. It also has minimal requirements from the CPU/Memory, making it ideal for quiet PCs.

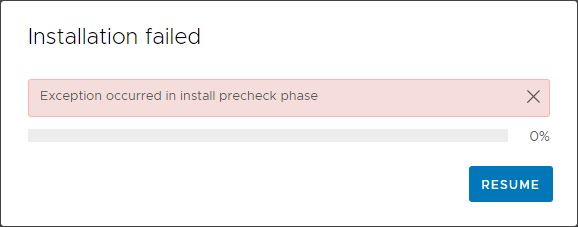
Unfortunately, now Windows 8.1 is officially out of support as of early 2023, you may want to think twice about it connected to the Internet, which is fairly essential to get any guide data.  Homebrew options of running WMC on top of Windows 10 probably remain the best option, but probably not totally “set and forget” as Windows Updates do tend to break it.

Despite no development in nearly 15 years, for this purpose, it remains head and shoulders above:

Media Portal 2: Media Portal 2 is probably the closest to MCE/WMC.  Originally based on XBMC/Kodi, it suffers those same drawbacks of Kodi ‘s Backend/Frontend architecture, namely high system requirements and unreliability when using standby on the Backend.  MP2 also has inconsistencies on the UI, as some functions only work with certain skins.  MP2 lacks any kind of remote scheduling, either native or 3rd party (Media Portal 1 does have some limited functionality in this regard though, via 3rd party, community projects). I have suffered a fair number of application glitches on the Frontend interface, especially the x64 version.  MP2 is open source and free to use, and out of the box, supports the standard MCE type remote controls on a usable 10′ interface.  The TV Server lacks a 10’ interface, so if you run the Backend and Frontend on the same PC under your TV, it’s going to need you to plug a keyboard and mouse in, and sit near, whilst you configure it, and believe me, configuring the guide is fiddly (use the WebEPG plugin they supply, but in the UK you have to adjust every channel).  Development seems slow.

Kodi: A hugely popular open source project, mostly known for the various plugins that allow illegal streaming of content.  However, as a unified system, its definitely lacking, based on the backend/frontend architecture, with everything from the backend being streamed to the frontend, even if on the same PC.  The result is high system requirements.  DVR and Live TV are afterthoughts, and poorly developed and rarely improved.  Reliability isn’t that great, particularly DVR functionality, although the robustness of the application has improved dramatically over the years.  Like other skinnable options, different skins can cause the loss of some functionality, meaning the default Confluence skin is probably the most reliable, if somewhat dull.

Plex: To enable any DVR/TV functionality, you have to buy a Plex Pass, which is either recurring monthly fee, or a one off of around £100/$120.  To be perfectly blunt, if wanting to use as an under TV solution, save your money.  It only supports a tiny subset of Hauppauge TV cards and nothing else.  There are some “community supported” cards, but in my experience, you will always be tweaking and messing around to get things working briefly.  Even if you do use a supported Hauppauge card, you will find recordings frequently fail, and the guide (only option is a really slow download from Plex) is really unreliable.  In addition, the interfaces available are dreadful, and really require the use of a keyboard and mouse – totally unsuitable as a media device for you living room.  System requirements are high, and on Windows inconsistent – The Backend server is 32bit only, but the 2 offered frontends are x64 only.  One of those offered frontends is effectively abandoned, and it looks like the other will be replaced in the future.  Its rare for code to be that bad that it needs to be abandoned.  And to do it twice….

MythTV: A Linux only option.  Whilst Linux has come a long way in terms of user friendliness, for most, it wouldn’t be as familiar as Windows.  That, and the reduced tuner support, makes it a slightly more geeky solution, although premade distributions are available.  It feels less polished that other solutions mentioned, and I only have 1 tuner that will work with it, so didn’t use it for that long.

Obviously, if you are simply after a streaming box, rather than an all-in-one solution, that will change the dynamics.  But for a pure streaming device, I’d be more inclined to see what apps your Smart TV has, or look at non PC based solutions like Firestick or Roku.  As soon as you need a DVR solution though, its either a dedicated TV recorder or Microsoft Media Center. End of.

Posted by admin in Experiences

ESXCLI commands to configure VMware ESXi hosts for Starwind

Unsure if it survives upgrades yet….


Base commands as follows:

esxcli storage nmp device list | grep iSCSI
  Device Display Name: STARWIND iSCSI Disk (eui.46bed2d1ba1297d4)
  Device Display Name: STARWIND iSCSI Disk (eui.e1c4a9d50c1de985)
  Device Display Name: STARWIND iSCSI Disk (eui.75b468162d2473ac)
  Device Display Name: STARWIND iSCSI Disk (eui.0bd446722e88d9a6)

esxcli storage nmp device set --device eui.46bed2d1ba1297d4 --psp VMW_PSP_RR

esxcli storage nmp psp roundrobin deviceconfig set -d eui.46bed2d1ba1297d4 -t iops -I 1


Can be put in a script:

for i in `ls /vmfs/devices/disks/ | grep eui. | cut -b 1-20` ; do echo $i; esxcli storage nmp device set --device $i --psp VMW_PSP_RR; esxcli storage nmp psp roundrobin deviceconfig set --device $i -t iops -I 1;done
Posted by admin in VMware

vCenter Error – Exception occurred in install precheck phase

I see this one a fair bit, both in my own lab and in production environments, when doing vCenter updates.

The simplistic solution is to ssh to the vCenter appliance, log on with the root crednetials (not the Single Sign On ones), open a bash shell by typing shell, then removing a conf file:

rm /etc/applmgmt/appliance/software_update_state.conf

Retry the update from the VAMI interface again.


Anecdotally, it might coincide with aborted upgrades, but currently unable to confirm.

Posted by admin in VMware

Backup Exec Returns error about Exchange database not mounted

TLDR

Restart the Microsoft Exchange Replication service, either via services.msc GUI, or via:

net stop MSExchangeRepl
net start MSExchangeRepl


Recently I was asked to look into why somebody was having the following error during Agent level backups of an Exchange 2013 server:

The job failed with the following error: The database specified for the snapshot was not backed up because the database was not mounted.

Once this had happened, all subsequent Exchange server backups would fail as well. They had always been resolving it with reboots of the Exchange server, based on an article they had found on Veritas, but this always meant a 10-15 minute outage, which they were trying to avoid – they are a small outfit with a single Exchange server.

Reading through the Veritas documentation, the database backups ran through the Microsoft supplied VSS writers, and it looks like the VSS process was getting stuck, and hanging.  The VSS for Exchange in Exchange 2013 onwards is part of the Microsoft Exchange Replication service.  Restarting this service resolved the failed backups.

I suspect the reason why it is hanging is their Exchange server is virtualised, and their hypervisor’s disk system isn’t really fast enough, with occasional spikes in latency.

Posted by admin in Exchange

Exchange Mailbox Quarantined

Sometimes an Exchange mailbox will get quarantined due to mailbox threads hanging. Reasons may be corruption, AV scanning, backups, storage issues and all manner of things.

For Exchange 2013 onwards:

Check which mailboxes are quarantined:

Get-Mailbox | Get-MailboxStatistics | Where {$_.IsQuarantined -eq $True} |  fl DisplayName

Scan for corruption:

New-MailboxRepairRequest -mailbox <logon_id_of_mailbox> -corruptiontype Aggregatecounts,searchfolder,provisionedfolder,folderview

Check Repair Progress:

Get-MailboxRepairRequest -mailbox <logon_id_of_mailbox>

Re-enable mailbox:

Disable-MailboxQuarantine <logon_id_of_mailbox>
Posted by admin in Computing Blogs

New Edge and vCenter prompts

vCenter under the New Chromium based Edge browser always prompts when using the enhanced authentication plugin or VMRC.

To enable a checkbox to remember your setting, add the following registry key (you will have to create the Edge key)

HKEY_LOCAL_MACHINE\SOFTWARE\Policies\Microsoft\Edge

dword: ExternalProtocolDialogShowAlwaysOpenCheckbox = 1
Posted by admin in VMware

Suppressing System logs on host are stored on non-persistent storage

This occurs is the scratch location is to RAM, rather than a datastore, usually if the ESX boots from flash media (as writing the logs would accelerate flash wear).

Obviously the correct fix is to point it to a datastore:

Syslog.global.logDir = [<datastore-name>] /scratch/log

Syslog.global.logDirUnique = true

(The second is if multiple ESX’s are configured to write logs to same location)

However, there may be scenarios when this is not desirable. For example, if all your datastore storage is VSAN (which doesn’t support having the ESX hosting VSAN writing to its VSAN datastore), and you don’t care about the logs. You simply just need the message suppressed so as not to hide other errors.

Set:

Syslog.global.logHost = udp://127.0.0.1:514

(Or even to a valid syslog server if you have one)

Posted by admin in Computing Blogs, VMware

Converting an HPE gen8 Common Slot PSU into a 12/24V supply

One of my hobbies is Radio Control Models, and for that, I often need a high current 12V or 24V power supply for the battery chargers I use.

There is a ready source of various HPE server PSUs that are ideal, and plenty of guides on the net for converting them.  However, for the ones I had (HPE gen8 common slot, part numbers HSTNS-PL28 (460w) and HSTNS-PD29 (750w)) , these guides did not work. Hence this guide.


So this is the PSU we are using for this guide:

First you need to add a link wire between pin 33 and the large GND pad, and also a resistor between pins 36 and 37 as show in this image:

The resistor needs to be around the 3k mark, but not absolutely critical. Note the use of heatshrink over it to prevent any shorts.


Power on the PSU, and the green LED near the fan should come on within a second, and once this is lit, 12V is available on the larger pads:

The wires to the charger can go from these pads, and a cover printed as per the one I uploaded to Thingiverse – https://www.thingiverse.com/thing:3116013


24V Conversion.

Caution, there are lethal voltages inside these PSUs, so before dismantling, disconnect from the mains, and leave overnight for internal components to discharge.  Only attempt this procedure if you are competent and confident of what you are doing, and read all the instructions to understand them first. Incorrect connections can be lethal. I take no responsibility under any circumstance.

We need 2 supplies modified as above. However, as the case is connected to the 0V and Earth, on the second one, we need to disconnect the connection between the case and the 0V (and keep earth in place, for safety reasons, obviously! Beware, I’ve seen guides for other PSUs disconnect Earth, which could potentially be lethal).

So on the PSU destined to be the 12v-24v step up, follow this procedure.

Undo the top 4 screws:

Remove the 4 fan screws, and push the LED back in towards the case:

Undo the earth tag

There is a screw just to right of power socket in image above that is not photgraphable, but its location can be ascertained from the pressed in nuts on underside of case. Remove this screw (there is just room for screwdriver to right of power socket, else move power socket which should be free now.


There is a small tab that needs gently lifting behind the fan, seen clearer on this dismantled picture:

Keep the plastic bit that fits over the tab safe ready for refit.

Near the edge connector are 2 screws (that screw into the studs we are going to grind down later), which need removing.

With a bit of a wiggle – the power socket can be stuck in quite hard, you should be able to remove the PSU from the rest of the case.

The plan now is to modify the mounts to electrically isolate them from the 0v of the PSU board. These mounts make contact with the PCB.

My method is to grind them down to about 1mm high (hopefully just enough to still be able to have enough screw thread left in the pressed nut), place some plastic M3 nuts between them and the PCB, and use plastic M3 screws.  I’m sure there are plenty of other options, but the key is that the 0v on the PCB must not make contact with the PSU case any more. The red arrows are when the M3 plastic nuts are, and blue showing the M3 plastic screws (I also had to use a plastic washer here). These screw into the existing threads that were partially ground down earlier.

Rebuild is reverse of strip down. The small plastic piece that goes over the lug also secures the PCB, so ensure PCB fits in the slot on rebuild.


After rebuild, with a meter, ensure that the mains earth is connected to the PSU case, and that the 0V is not.


Run a cable from the 12V of the 0-12V PSU to the “0V” of the 12-24V PSU. 24V is now available via the 0V of the 12V PSU and the 12V of the 12-24V PSU.

Voila!

And fully built using some 3D printed parts to cover the back and hold them together (parts uploaded to Thingiverse – https://www.thingiverse.com/thing:3116013 )

Posted by admin in Information and Guides

WSUS Snippets

For diagnosing slow downloads from MS, set download to foreground

$conf=(get-wsusserver).GetConfiguration()
$conf.BitsDownloadPriorityForeground=$true
$conf.save()

Restart BITS to take effect (WSUS has a dependency, so will also restart). Set back to false after testing, obviously, else you may overload your connection.

AdamJ clean-up script – http://www.adamj.org/clean-wsus.html – sadly now commercial :(, yet another example of someone who has been given all the info by everyone else, created a simple, but useful script that so many have become reliant on, and then personal greed has set in.

Limit WID database memory use – http://www.stugr.com/2013/01/24/wsus-limit-sql-windows-internal-database-memory/ – essentially these commands from a cmd prompt:

osql -E -S \\.\pipe\Microsoft##WID\tsql\query

exec sp_configure 'show advanced option', '1';
reconfigure;
exec sp_configure;
go

Check for max server memory in output, likely to be massive such as 2Tb (output is in MB)


exec sp_configure 'max server memory', 2048;
reconfigure with override;
go
quit

This sets to 2GB (max server memory = 2048MB)

Clean up disk

Occasionally its necessary to delete all the downloaded content and redownload, in order to reclaim disk space that the WSUS Clean Up tasks fail to do.

Stop WSUS

Stop BITS

Empty the BITS queue via Powershell (this rarely works):

import-module bitstransfer
get-bitstransfer –allusers | remove-bitstransfer

Empty the BITS queue (Last resort): (need to stop BITS again if you tried powershell method above)

del "%ALLUSERSPROFILE%\Application Data\Microsoft\Network\Downloader\*.*"

Delete the contents of the WSUScontent folder (but not the folder itself

Tell WSUS to check all downloaded files are present, and download any missing ones (which will be all of them)

"%systemdrive%\Program Files\Update Services\Tools\wsusutil.exe" RESET

Above command will restart BITS and WSUS, else start them manually

A reboot may be needed if you used the del command to delete BITS queue

Other useful commands:

"%systemdrive%\Program Files\Update Services\Tools\wsusutil.exe" checkhealth
bitsadmin /list /allusers

Posted by admin in WSUS